1. Choose File>Import>Import to Stage, and choose a bitmap graphic for your background. Flash imports your graphic and places it on the stage. Rename the layer, "Background". Click on the dot below the Lock icon in your "Background" layer to lock it which prevents you from accidentally moving it.
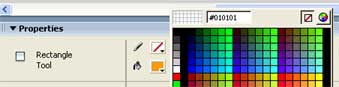
3. Select the Rectangle tool. Choose a color for the insides (the Fill) and a color and line thickness for the outline (the Stroke). You also have the option of choosing no stroke for your rectangle by selecting the color chip at the top that has the red diagonal line through it.
The example at right shows the Rectangle tool with an orange fill and with no stroke.
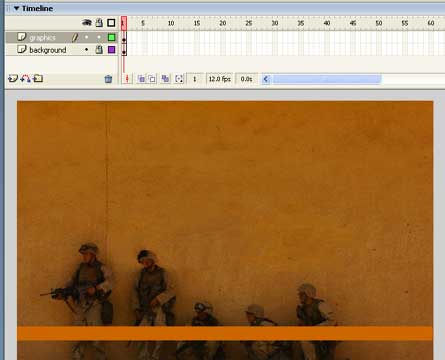
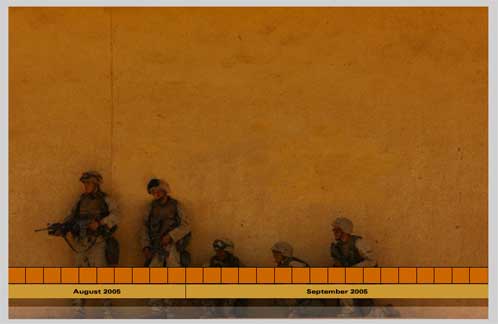
4. Make sure that your "Graphics" layer is selected. With the Rectangle tool, draw a long rectangular box that spans the stage, close to the bottom edge. In the example on the right, we've drawn a long orange rectangle. The "Background" layer contains the large photo of soldiers.
5. Select the Line tool. Draw divisions on the orange rectangle with several vertical line segments. While you drag out a line segment, you should hold down your SHIFT key to constrain the line segment to 90 degrees.
Also, check to see if the Magnet icon (see figure at right) under the Selection tool options is selected. The Magnet icon forces elements to snap to nearby edges and vertices.
Don't worry yet about making the divisions of your orange rectangle equal. You will do that in the next step.

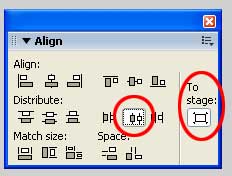
7. With all the vertical line segment selected, choose Window>Align to open the Align panel. The Align panel lets you line up elements and to distribute them equally.
Click on the "To Stage" option and the Distribute Horizontal Center button. This equally distributes all the selected elements along their horizontal centerlines relative to the stage.
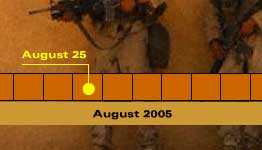
8. Create more boxes, divisions, and add text with the Text tool to add the details as needed for your particular timeline.
10. Select the Text tool, click on the stage, and begin typing the title of your first button. You can choose different fonts, typestyles, sizes, and colors for your text in the Property Inspector.
Make sure that you have selected Static Text in the Property Inspector. Static Text is for text for display purposes. The other options (Dynamic Text and Input Text) are special text types that are used when you want ActionScript control over them.

11. Now click the Line tool and create leader lines to extend from your text to a point on your timeline. You can also create additional design elements like a colored dot with the other drawing tools, if desired.
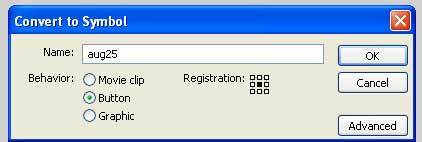
Choose the Selection tool (black arrow tool) again. Click on your text and shift-select all the graphic elements you want to include in your button.
Your piece of text and other selected elements are converted to a Button symbol, and the new symbol appears in your Library.
12. Now you will need to edit your new Button symbol in order to define how your button looks when a mouse cursor interacts with it.
Enter symbol-editing mode by doing any one of the following:
-Double-click on the item or preview window in the Library
-Choose Edit>Edit symbols
-On the top right-hand corner of your Flash document, click on the Edit Symbols buttons.
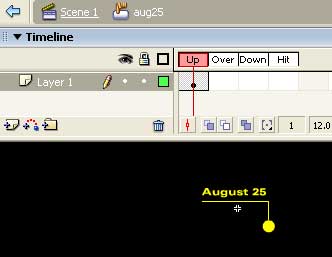
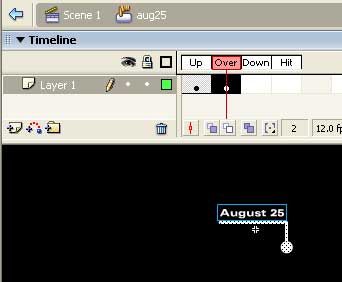
13. You will see four distinct states on the timeline of your Button symbol: UP, OVER, DOWN, and HIT.
The UP state shows what the button looks like when the mouse cursor is not interacting with it.
14. Choose Insert>Timeline>Keyframe. A new keyframe is created in the next frame, which is the OVER state, and the contents of the previous keyframe is copied into it.
Select the text in the OVER state and change its color in the Property Inspector. Select the graphical elements and change their color as well.
The OVER state shows what the button looks like when the mouse cursor hovers over it.
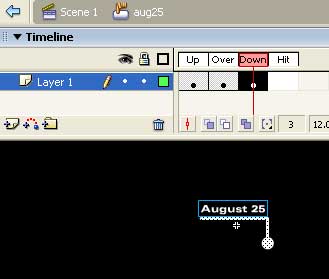
15. Choose Insert>Timeline>Keyframe. A new keyframe is created in the next frame, which is the DOWN state, and the contents of the previous keyframe is copied into it.
We'll leave the DOWN state identical with the OVER state.
The DOWN state shows what the button looks like when the mouse button is depressed over the button.
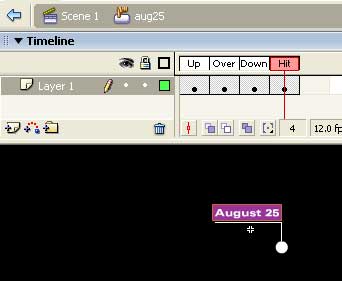
The HIT state indicates the area that is "hot", or the clickable area of the button.
Since you'll want the entire area around the text to be "hot" (responsive to a button click), select the Rectangle tool and draw a filled box to cover the text. The color of your rectangle doesn't matter because it is only indicating the clickable area of your button. The viewer will never see the HIT keyframe of your button. The filled rectangle will sit under your text because Flash will always display text over shapes unless they are separated on different layers.
17. Return to the main movie timeline. Select your first button on the stage. In the Property Inspector, enter a name in the <Instance Name> field.
By naming a button, you can identify it with ActionScript and attach code to it. Select the other buttons on the stage and give them unique names.
Note that you must follow a few rules on naming:
-Names must not contain spaces or special characters. Underscores are okay.
-Names must not begin with a number.
-You can not use names that Flash uses as special commands in the ActionScript language itself (such as this, new, Sound, Math, etc.), so make your names unique.
-Add the suffix, _btn, to your name to identify it as a button.
-Be mindful of upper- and lower-cases.
Note also that the name of your button on the stage (called an instance) is different from the name of the button symbol in your Library (created in step 12). The name of the symbol in your Library is merely an organizational aid. The name you give your instance in the Property inspector is the one that ActionScript will use to identify it.

Select all the frames below frame 50 and choose Insert>Timeline>Frame. Flash adds frames to extend the timeline to frame 50.
In each keyframe, import photos, graphics, or create text that corresponds to the content for each button. In this example, there are 5 keyframes in the "Content" layer, an empty one at frame 1, and at frames 10, 20, 30, and 40. Each of those keyframes contains a different photo and text.
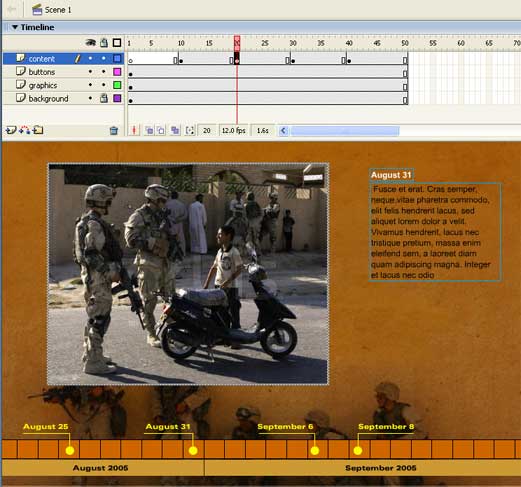
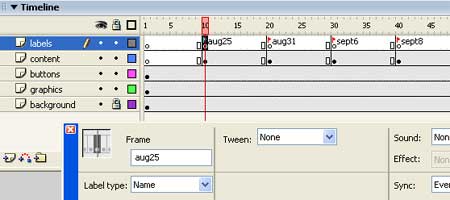
Select the first keyframe. In the Property Inspector, give a name for the frame. In this example, we've named the first keyframe aug25. Do the same for all the keyframes in the "Labels" layer. These labels will provide convenient references so ActionScript can direct the viewer to a specific point along the timeline.
This command prevents your Flash movie from playing and displaying all your content in sequence. Instead, a stop command holds the playhead at frame 1 until the viewer clicks one of the buttons.
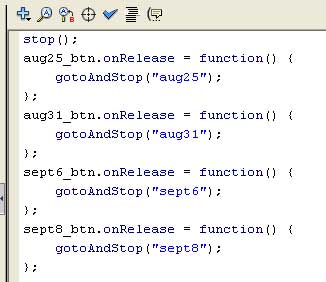
24. On the next line, enter the code as seen on the right.
In this example, there are four buttons, named aug25_btn, aug31_btn, sept6_btn, and sept8_btn. Each one is assigned the event handler, onRelease, which is triggered when the mouse button is depressed and then released over the button. Any actions within the curly braces of each function will be executed when that happens.
The action assigned to each function is a gotoAndStop() command that sends the Flash playhead to a labeled frame corresponding to a new photo and text. Be sure that you include the quotation marks around the frame label names.
You can copy and paste this code and modify it (replace the buttonName_btn and the frameLabel names) in your own Flash movie:
buttonName_btn.onRelease = function(){
gotoAndStop("frameLabel");
};