DEPLOYMENT
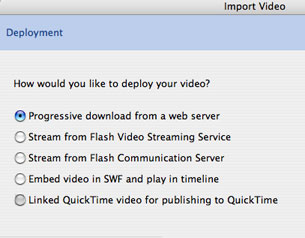
In the next screen, "Deployment", you will choose how you want your video to appear in Flash. Choose the first option, Progressive download from web server.
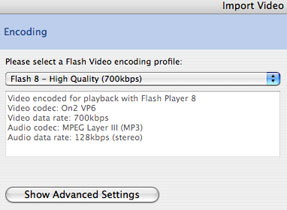
ENCODING
In the next screen, "Encoding", you will choose the compression settings to determine the quality of your video and audio. If you want to publish your Flash movie for a previous Flash player version, choose Flash Player 7-High Quality. If you want to publish your Flash movie for the latest Flash player version, choose Flash Player 8 - High Quality. Higher quality results in a better picture, but a larger filesize. Lower quality results in a more degraded picture but a smaller filesize.
SKINNING: FOR THE FLASH 8 PLAYER
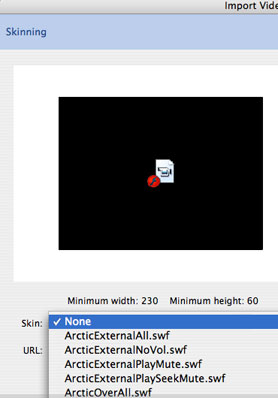
In the next screen, you can choose a "skin", or a pre-made interface to control the playback of your video.
If you are publishing for Flash Player 8, then you can choose a variety of different skins in the pulldown menu, including "None" at the very top, as shown here.
The different skins provide alternative designs as well as different combinations of buttons.
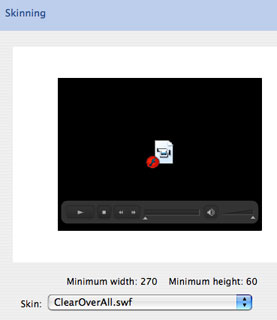
SKINNING: FOR THE FLASH 7 PLAYER
If you intend to publish your movie for the Flash 7 player, then you will not be able to choose a skin from the pulldown menu. Flash will use an older version of a playback component (not listed on the pulldown menu) which has only one appearance, as shown here.
KEEP TRACK OF EXTERNAL FILES
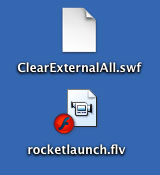
Flash encodes your video and saves the FLV file in the same place where your Flash movie is saved. If you chose a Flash player 8 skin, then a SWF file for that interface is also created.
In this example on the right, the video "rocketlaunch.flv" and the skin "ClearExternalAll.swf" has been created.
ADD A STOP ACTION
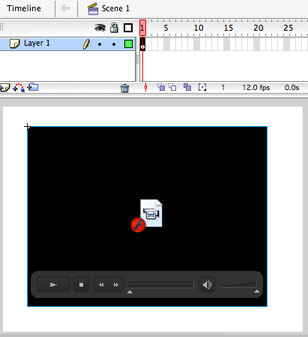
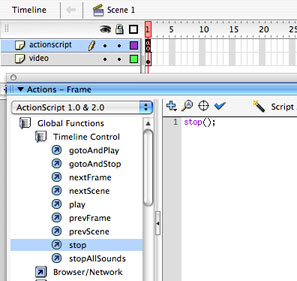
Your video is not tied to your Timeline and will play independently of other elements, so you should stop the Timeline when your video appears.
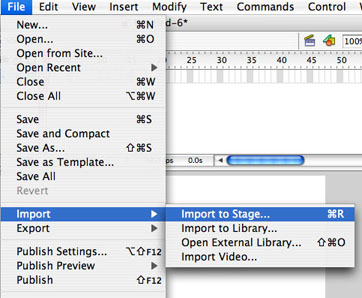
Insert a new Layer and insert a new keyframe at the same point in time when your video appears. Open the Actions panel (Window>Actions) and insert a stop() action.
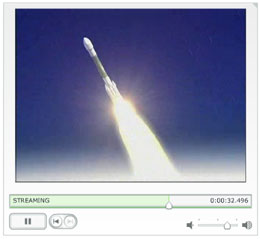
PLAYBACK SETTINGS
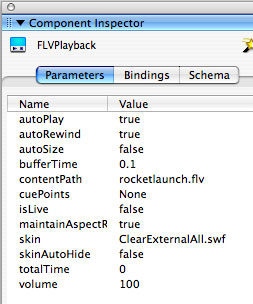
You can change the playback settings for your video component. Open the Component Inspector (Windows>Component Inspector) and click on the Parameters tab.
FLASH 8 COMPONENT
If you are publishing for Flash 8, you will see the "FLVPlayback" component. You can change the parameters listed under the "Name" column by clicking on the entries under the "Value" column.
•AutoPlay determines whether your video will automatically start
•AutoRewind determines whether your video will go back to the beginning after it finishes
•ContentPath is the path to your video file.
•SkinAutoHide determines whether the interface is always visible (true), or only visible when the user passes their mouse over the video (false).
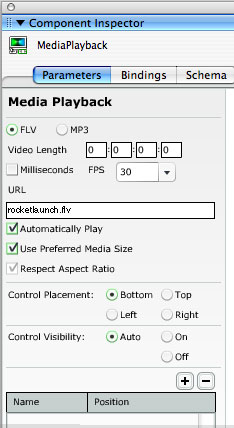
FLASH 7 COMPONENT
If you are publishing for Flash 7, you will see the "MediaPlayback" component.
•URL is the path to your video file.
•Automatically Play determines whether your video will automatically start
•Control Placement determines where the controller is placed
•Control Visibility determines whether the interface is always visible (on), no visible (off), or only visible when the user passes their mouse over the video (Auto).