


Creating a Photo Slideshow
Now that you know how to create a simple fade-in and fade-out effect on a single photo using a motion tween, you can string multiple photos together to create a photo slideshow, with each photo fading into the next. The process is similar, except that you will be handling photos on multiple layers. Remember that each object that has a motion tween must be separated on its own layer. So if you have three photos in your photo slideshow, you will need three layers on your timeline.
You’ll begin with several JPG images, each already scaled to its final size in an image-editing application like Photoshop. We’ll use these three examples:
The final Flash slideshow will have fade-in and fade-out transitions between each of the photos like the following:
Import the Images
1. In a new Flash document, choose File>Import>Import to Stage (Control-R for Windows, Cmd-R for Mac).
Browse to the images you wish to import. Shift-click to select multiple images, and click Open. Flash imports the selected images and places all of them on the stage. You only see a single image, however, because the other images are behind the first.
2. Open the Align panel (Control-K for Windows, Cmd-K for Mac). Select all the images. Then click the To Stage option in the Align panel, and then the Align horizonal center and Align vertical center buttons.
All your images become centered on your stage.
Distribute to Layers and Convert to Symbols
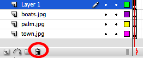
1. Each photo must be on its own layer before you can apply a motion tween to it. Select all the photos (Edit>Select All, Control-A for Win, Cmd-A for Mac). Then select Modify>Timeline>Distribute to Layers (Shift-Control-D for Windows, Shift-Cmd-D for Mac).

All your photos are put in separate layers, with each layer named according to the photo filename.
2. Delete the original layer that contained all your original images. You don’t need it anymore. Select the layer and click on the garbage can icon at the bottom of the layers.
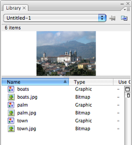
3. Select the first layer and choose Modify>Convert to Symbol (F8). The Convert to Symbol dialog box appears. Enter the name of your photo, select Graphic symbol, then click OK. Continue doing this for all your layers to convert the photo in each layer into a graphic symbol.
The content of each layer is converted into a graphic symbol. Your library should now contain the original imported bitmaps as well as the graphic symbols of those bitmaps.
Establish the Keyframes and Change the Alpha
You must think about the beginning and end states of each photo, just as you did when you created the fade-in and fade-out effect for a single photo. Each change requires a new keyframe. In this example, you’ll want four keyframes: the first keyframe when the photo is at 0% opacity, the second when the photo is normal, the third when the photo is at normal, and the fourth when the photo is at 0% opacity.
1. Select the frames under frame 10 for all the layers. Choose Insert>Timeline>Keyframe (F6).
All the frames under frame 10 become keyframes.
2. Select all the frames under frame 20 and 30 and insert keyframes at those points along the timeline as well.
You now have four keyframes in all the layers.
3. Move the playhead to the first keyframe on the timeline. Choose Edit>Select All (Control-A for Windows, Cmd-A for Mac).
All the symbols in the first keyframe become selected.
4. In the Property Inspector, choose Alpha from the Color pulldown menu, then use the scrollbar to set the opacity level of all the images in the first keyframe to 0%.

5. Move the playhead to the last keyframe on the timeline. Choose Edit>Select All (Control-A for Windows, Cmd-A for Mac). In the property Inspector, again choose Alpha from the Color pulldown menu, then use the scrollbar to set the opacity level to 0%.
Steps 3-5 is summarized below:
Apply the Motion Tween and Stagger the Effect
1. Select the first keyframes of all the layers. In the Property Inspector, choose Motion next to the Tween pulldown menu.
Flash applies a motion tween between the first keyframe and the second keyframe for all the layers. A blue arrow is drawn between the keyframes to indicate a motion tween.
2. Select the third keyframes of all the layers. In the Property Inspector, choose Motion next to the Tween pulldown menu.
Flash applies a motion tween between the third keyframe and the last keyframe for all the layers. A blue arrow is drawn between the keyframes to indicate a motion tween.
3. All your images now fade-in and fade-out at the same time. You must stagger them in order to have each image transition smoothly to the next. Select all the frames in the top two layers and drag them to the right so that the last motion tween of the bottom layer overlaps with the first motion tween of the top layers.
4. Select all the frames in the topmost layer and drag them to the right to overlap the motion tweens in the same manner.
Your final timeline should look like a staircase, with the motion tweens in a staggered formation.
5. Play your completed slideshow by choosing Control>Play (Enter or Return key)
As the image in the bottom layer fades out, the image in the layer above it fades in, creating a smooth cross-dissolve.
Study the final .FLA source file here.
![]()